If you have ever spun up a fresh Ubuntu Server with full-disk encryption, deployed your web stack, and then found yourself staring at a "No space left on device" error despite paying for a drive twice that size, you are not alone. You haven’t lost your mind, and you didn’t mess up your partition math; you simply encountered Canonical’s opinionated storage behavior.
The Mystery of the Half-Empty VPS: A Production Tale
In early 2020, I ran into this issue on a modest VPS with a 20 GB disk running Webinoly, where only 8 to 10 GB of usable space remained after installation. Fast forward to 2022, and the same problem resurfaced on a 60 GB production server with GridPane, where Ubuntu allocated only 22 GB to the root partition, leaving the remaining space unallocated by design.
Summary & Key Takeaways
Ubuntu Server's Subiquity installer deliberately holds back approximately fifty percent of your encrypted disk capacity as unallocated LVM space to accommodate snapshot overhead, while Debian assigns the entire encrypted drive to the root filesystem immediately, making it less prone to storage friction on web servers. If you deploy Ubuntu Server via standard defaults, running lvextend -l +100%FREE and resize2fs immediately after initial login should be part of your standard post-provisioning checklist.
हिंदी सारांश
जब आप Ubuntu Server में फुल-डिस्क एन्क्रिप्शन के साथ इंस्टॉल करते हैं, तो Canonical का नया Subiquity इन्स्टॉलर डिफॉल्ट रूप से आपकी कुल डिस्क का केवल 50% या अधिकतम 100 GB ही रूट ड्राइव को देता है। बाकी बची हुई 50% जगह LVM के अंदर Unallocated Space के रूप में छोड़ दी जाती है ताकि भविष्य में स्नैपशॉट या नए वॉल्यूम बनाए जा सकें। इसके विपरीत, Debian का इन्स्टॉलर आपकी पूरी एन्क्रिप्टेड डिस्क को पहले ही दिन बिना किसी झंझट के रूट ड्राइव को दे देता है। यदि आपकी उबंटू सर्वर में डिस्क स्पेस अचानक कम दिखने लगे, तो आप बिना सर्वर रीबूट किए sudo lvextend -l +100%FREE /dev/ubuntu-vg/ubuntu-lv और sudo resize2fs /dev/ubuntu-vg/ubuntu-lv कमांड चलाकर अपनी पूरी डिस्क रिकवर कर सकते हैं।
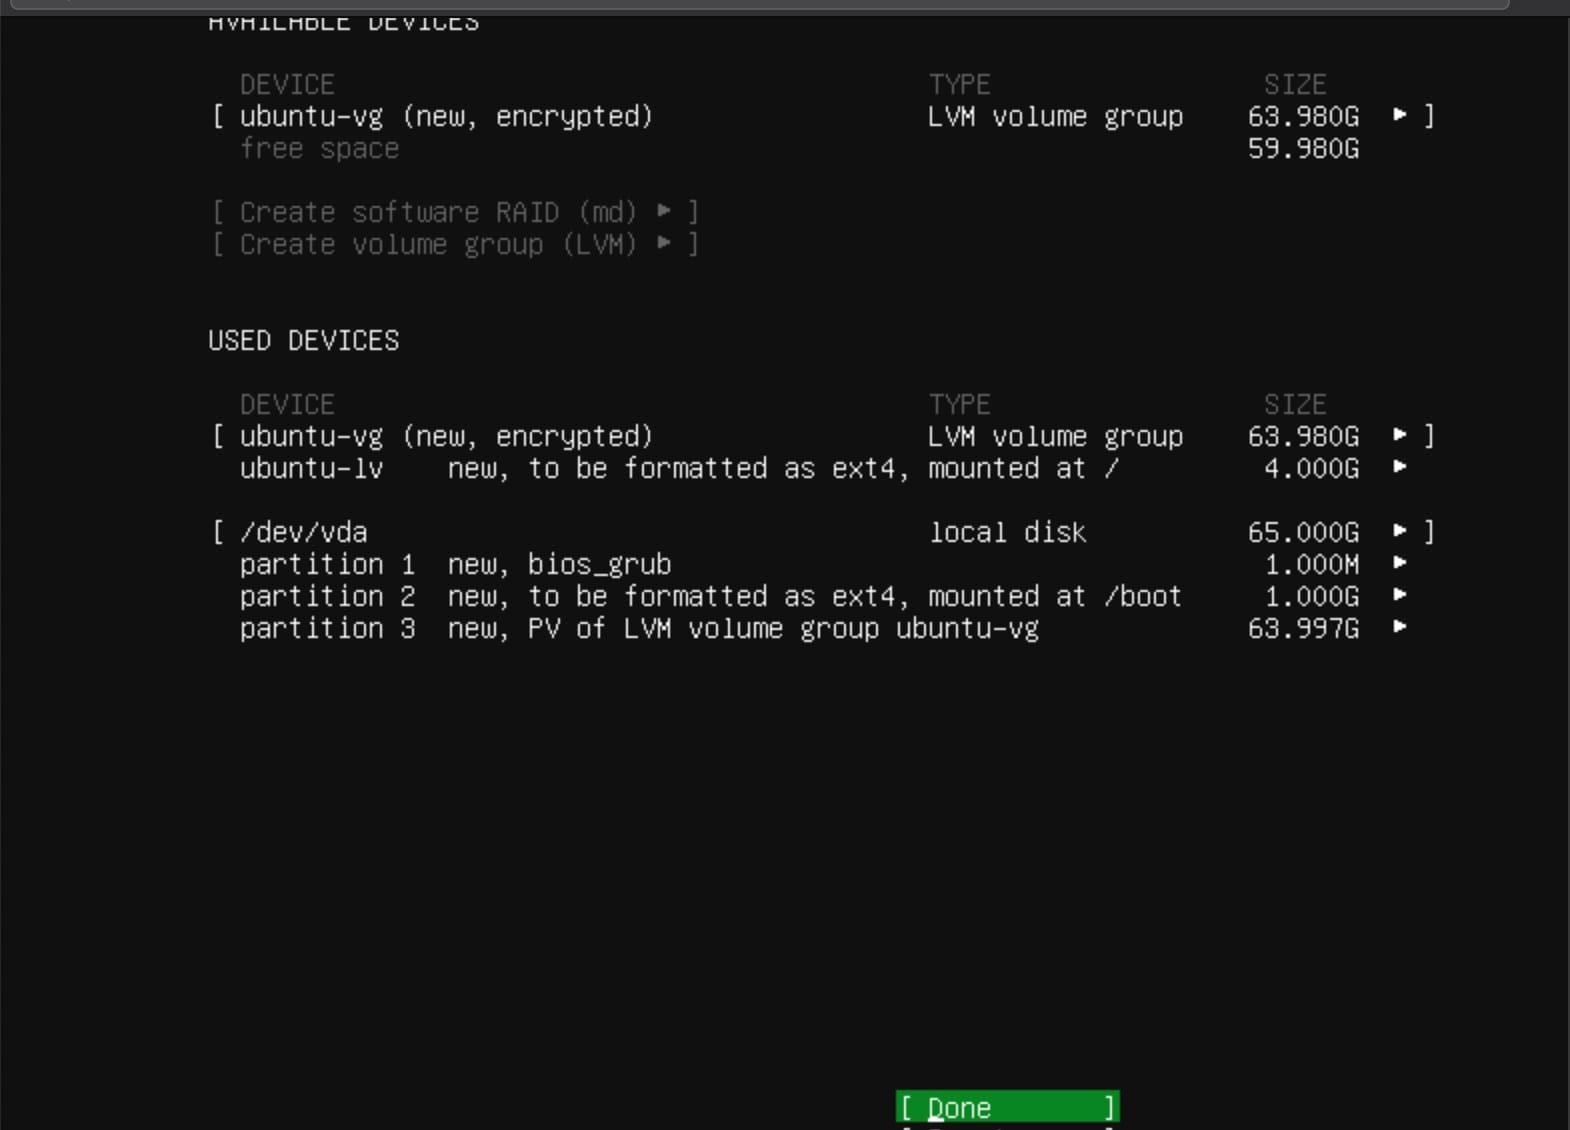 Ubuntu 20.04 installation on a VPS
Problem with reduced disk size
The core issue arises when the disk size in Ubuntu appears significantly smaller than the actual capacity. For instance, a 120 GB disk may show only 59 GB allocated to the root filesystem, as demonstrated in the lsblk output below.
disk is 120 gb. lsblk shows:
vda3               253:3    0  118G  0 part
  └─dm_crypt-0     252:0    0  118G  0 crypt
    └─ubuntu--vg-ubuntu--lv 252:1    0   59G  0 lvm  /
Why This Happens with Encrypted Disks
As you use your system, the amount of data stored on your disk increases. Over time, you may find that your disk space is no longer sufficient, particularly for encrypted disks where the encryption layer adds additional complexity to the resizing process.
Prerequisites: Tools Required to Expand Encrypted Disk
Before you begin, ensure the cryptsetup and lvm2 tools are installed on your system, as these are essential for all LUKS encryption and LVM operations. On Debian or Ubuntu-based systems, run the following command:
$ sudo apt-get install cryptsetup lvm2
 Using Rsync Remote Backup for Encrypted Ubuntu Disk
How to Detect Disk Space Issues on Encrypted Ubuntu Disk
To detect if you are running out of disk space, use the commands below as they will provide an overview of your disk usage and help you identify whether expansion is necessary.
$ lsblk
$ df -h
$ sudo pvdisplay
$ sudo vgdisplay
$ sudo lvdisplay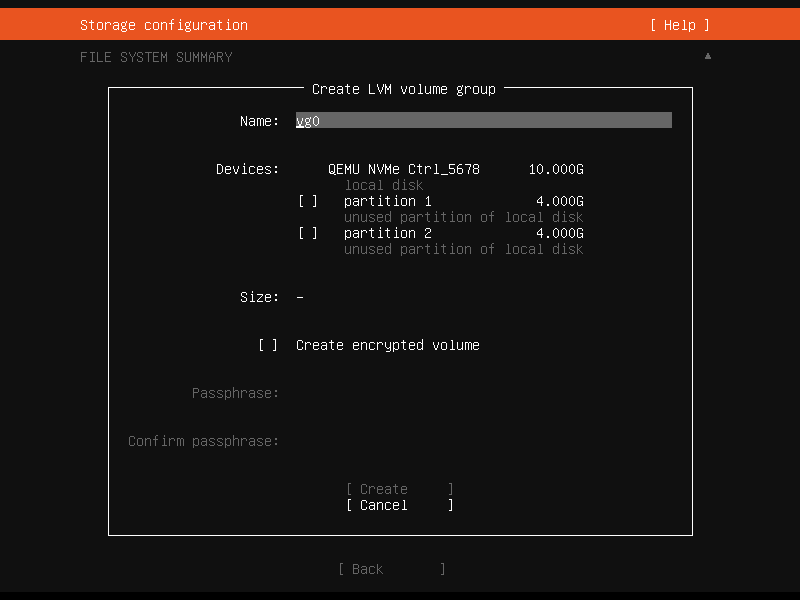 Configure LVM storage on Ubuntu Server Source
How to Expand Encrypted Disk on Ubuntu Linux
Use the following commands to expand your encrypted disk on Ubuntu Linux:
$ sudo cryptsetup resize dm_crypt-0
$ sudo pvresize /dev/mapper/dm_crypt-0
$ sudo lvextend -l +100%FREE /dev/mapper/ubuntu--vg-ubuntu--lv
$ sudo resize2fs /dev/mapper/ubuntu--vg-ubuntu--lv  # For ext4
$ sudo xfs_growfs /  # For xfs
Steps to Expand Encrypted Disk on Ubuntu Linux
Step 1: Check Current Disk Usage and Layout
First, check the current disk usage and layout to understand the existing configuration:
$ lsblk
$ df -h
$ sudo pvdisplay
$ sudo vgdisplay
$ sudo lvdisplay
Step 2: Resize the Physical Volume
Since your disk is encrypted, you need to resize the encrypted physical volume first. Start with the LUKS partition, then resize the physical volume:
$ sudo cryptsetup resize dm_crypt-0
$ sudo pvresize /dev/mapper/dm_crypt-0
Step 3: Resize the Logical Volume
Check the volume group details and extend the logical volume to use all available space:
$ sudo vgdisplay
$ sudo lvextend -l +100%FREE /dev/mapper/ubuntu--vg-ubuntu--lv
Step 4: Resize the Filesystem
Check the filesystem type, then resize it accordingly. For ext4, use resize2fs, and for xfs, use xfs_growfs:
$ df -Th
$ sudo resize2fs /dev/mapper/ubuntu--vg-ubuntu--lv
For xfs:
$ sudo xfs_growfs /Step 5: Verify the Changes
Check disk usage again to confirm the changes have applied correctly:
$ lsblk
$ df -h
$ sudo pvdisplay
$ sudo vgdisplay
$ sudo lvdisplay
Disk Sizes After Expanding Encrypted Disk on Ubuntu
After expanding, you can verify the new disk sizes using the commands below, which will show the updated volume group, physical volume, filesystem, and block device information:
$ sudo vgdisplay
  VG Size               117.98 GiB
  PE Size               4.00 MiB
  Total PE             30203
$ sudo pvdisplay
PV Name /dev/mapper/dm_crypt-0
VG Name ubuntu-vg
PV Size 117.98 GiB / not usable 1.00 MiB$ df -h
/dev/mapper/ubuntu--vg-ubuntu--lv 116G 9.9G 101G 9% /$ lsblk
└─vda3 253:3 0 118G 0 part
└─dm_crypt-0 252:0 0 118G 0 crypt
└─ubuntu--vg-ubuntu--lv 252:1 0 118G 0 lvm /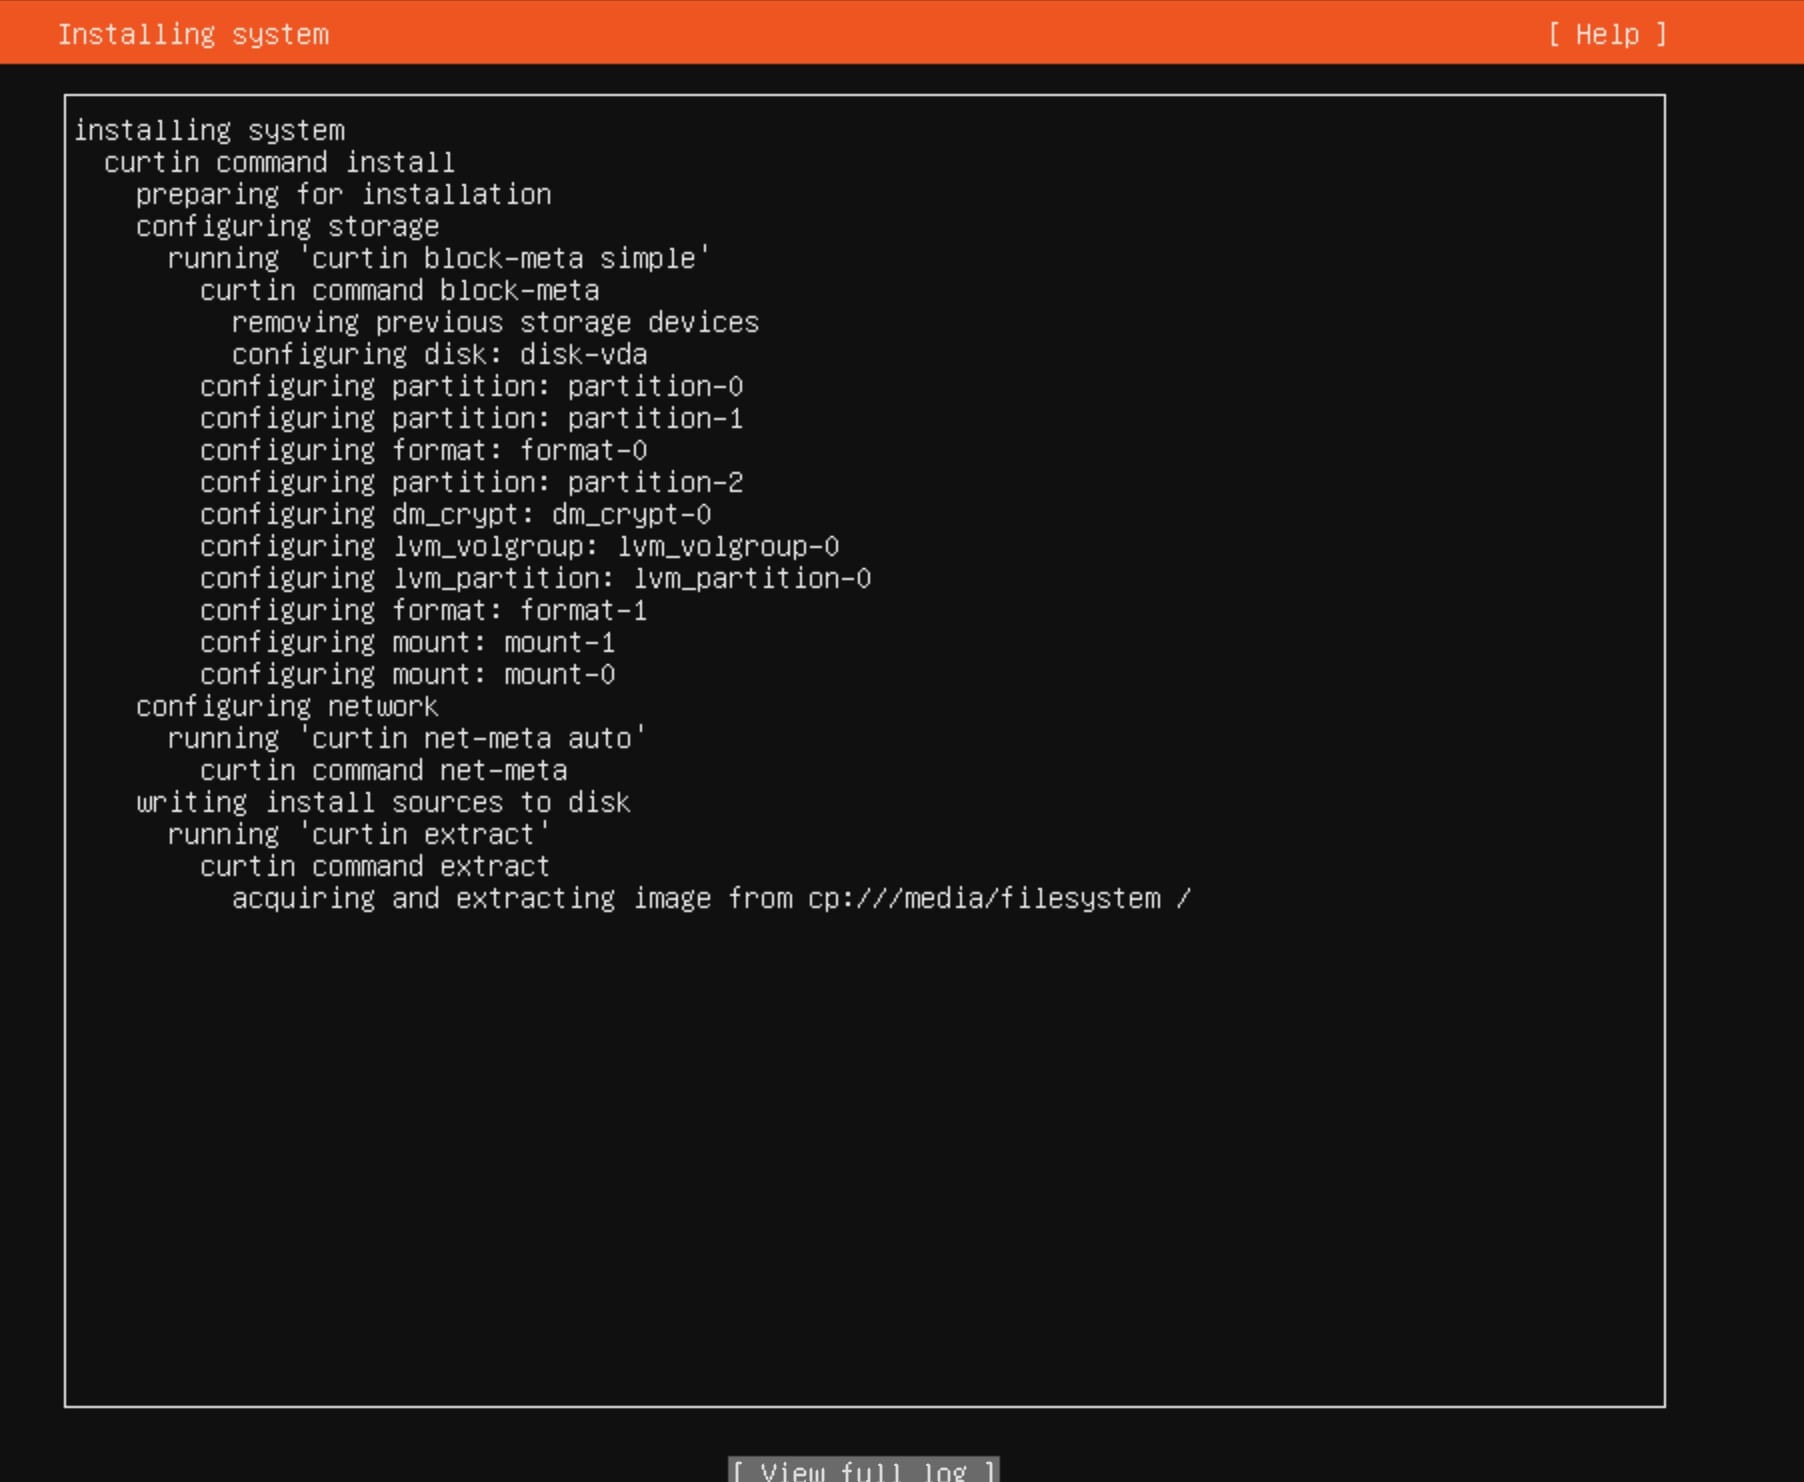 Install of Ubuntu 20.04 on VPS
Do's and Don'ts
When expanding an encrypted disk, always back up your data before making changes to your disk layout. Regularly check disk usage to avoid running out of space, and ensure cryptsetup and lvm2 are installed before proceeding. Monitor SSD and CPU temperatures during intensive disk operations, and follow each step carefully to avoid mistakes. Never skip backing up your data, rush through the steps, or ignore errors and temperature warnings, as SSD temperatures above 60°C during operations warrant investigation.
Disk Encryption & Allocation: Ubuntu (Subiquity) vs. Debian
To understand why this issue happens, you have to look at the architectural philosophies driving the installer systems behind both distributions. Starting around Ubuntu 20.04 LTS, Canonical replaced its legacy Debian-based server installer with Subiquity, which creates an encrypted LUKS container across your raw drive and places an LVM Volume Group inside it. However, Subiquity deliberately caps the root Logical Volume to 50% of the available space or 100 GB, whichever is smaller, leaving raw Physical Extents free inside the Volume Group so admins can instantly provision new logical volumes without shrinking existing filesystems. It also preserves empty headroom so administrators can take live system snapshots prior to major distribution upgrades or system-level changes.
While this design makes sense for large enterprise deployments, it is an unwelcome surprise for single-tenant VPS environments, web control panels, and smaller dedicated servers where you want 100% of your paid storage immediately available. Debian’s classic installer operates under a "What You See Is What You Get" paradigm. When you choose guided partitioning with encrypted LVM in Debian, it creates the LUKS outer shell across your physical disk, initializes an LVM Volume Group over 100% of that encrypted container, and allocates 100% of the available extents directly to your root filesystem. When you boot into a fresh Debian install, there is no missing storage, no hidden unallocated LVM buffer, and no need to execute post-install filesystem commands.
| Architectural Aspect | Ubuntu Server (Subiquity) | Debian (d-i) |
|---|---|---|
| Default Root Volume Size | 50% of VG capacity (or max 100 GB) | 100% of VG capacity |
| Encrypted LVM Setup | Reserved free space inside Volume Group | Fully allocated 1:1 drive container |
| Post-Install Maintenance | Required: Must run lvextend + resize2fs | None: Ready to use out of the box |
| Control Panel Compatibility | Prone to "Out of Space" errors if unadjusted | Smooth, predictable storage limits |
How to Reclaim Your Missing Space on Ubuntu
If you are currently running an encrypted Ubuntu server that is unexpectedly running low on disk space, you do not need to reinstall or reboot, as LVM allows online volume expansion and you can reclaim your unallocated space in under two minutes. Check your active logical volumes using lvdisplay or vgs to verify the missing allocation:
$ sudo vgsLook at the VFree column, where any significant free space listed is your missing storage sitting unassigned inside the Volume Group. Extend the logical volume to allocate 100% of the remaining free space to your main root volume:
$ sudo lvextend -l +100%FREE /dev/ubuntu-vg/ubuntu-lvExtending the LVM container only enlarges the virtual drive, so you must also expand the ext4 filesystem to fill the newly added space:
$ sudo resize2fs /dev/ubuntu-vg/ubuntu-lvRun df -h / to confirm that your root filesystem now reflects the entire capacity of your drive.
Frequently Asked Questions
What filesystem types are supported when expanding an encrypted disk? This guide covers both ext4 using resize2fs and xfs using xfs_growfs. For other filesystems, replace the resize command with the appropriate tool for your filesystem type, and you may need to install additional packages for less common filesystems.
Can I mount the encrypted partition automatically at boot? Yes, but you will need to manually unlock the encrypted partition during boot, as the password prompt will not appear automatically. After unlocking, the system will mount the partition per your /etc/fstab configuration, and you can refer to your distribution's documentation for setting up automated LUKS unlock with a keyfile.
Does this process work on Debian as well? The core steps are very similar on Debian, although the partition creation workflow differs slightly, particularly around fdisk, luksFormat, and fstab entries. What if I encounter a "No space left on device" error? This is the exact condition this guide addresses. Run lsblk and df -h to confirm whether your logical volume is smaller than your physical partition, then follow the steps outlined earlier to resolve it.
Also Read
-
Debian GNU/Linux Installation Guide — Advanced Partitioning & LVM
-
Ubuntu Community Discussion: LVM Root Partition Only Uses Half Volume Size
-
Red Hat Enterprise LVM Manual: Extending a Logical Volume Online
Share Your Thoughts
Have you expanded an encrypted disk on Ubuntu Linux? Did you encounter any errors or edge cases not covered here? Share your experience in the comments below — it helps others facing similar challenges.

This blog post was partly compiled and formatted using Mixtral Lechat AI for code verification and Google Gemini for formatting.