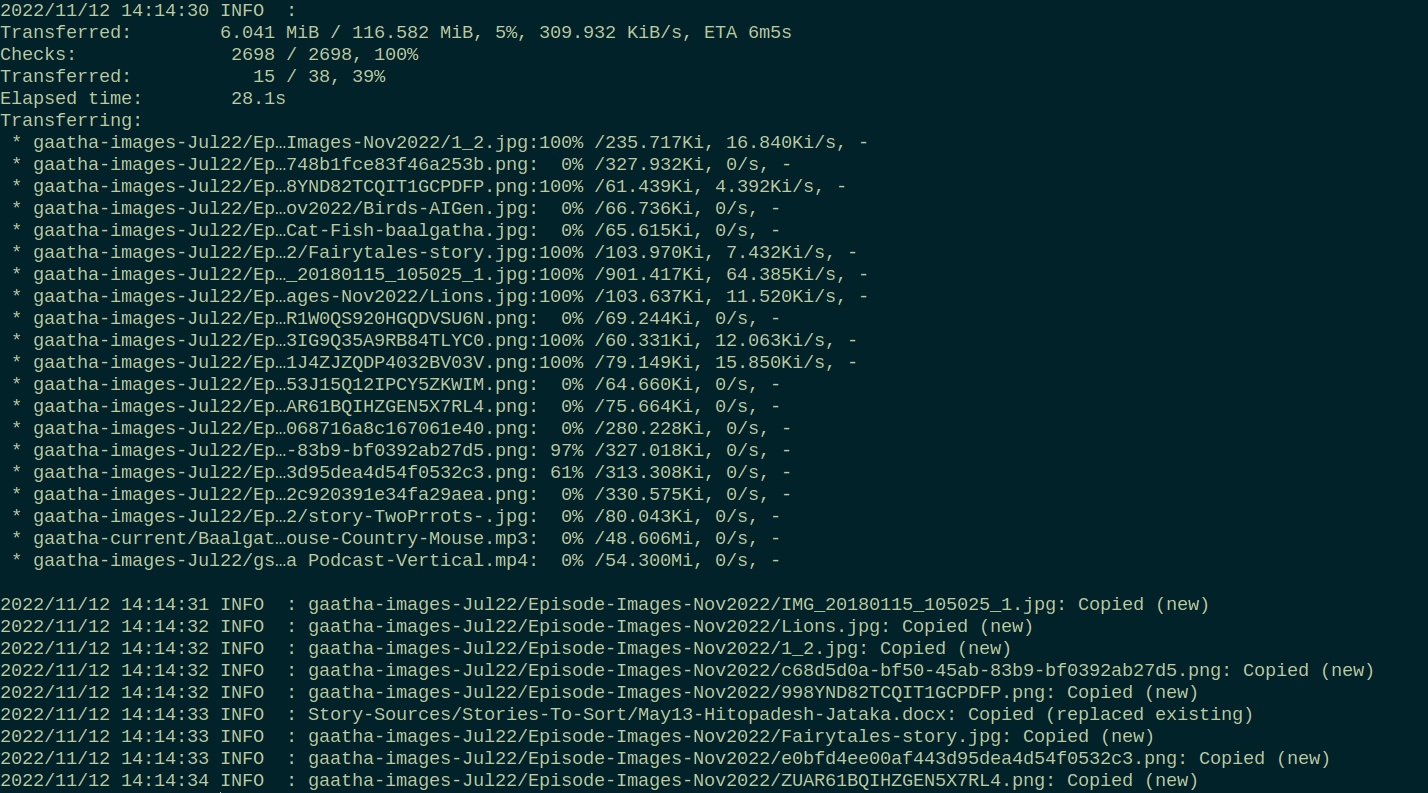
It was back in 2019 when I first stumbled upon Rsync during a late-night browse through Lowendtalk, a forum I frequently visited for VPS-related discussions. The thread was buzzing with comparisons between Rsync and its so-called "cousin," Rclone, and how each tool served distinct purposes in the world of data synchronization.
Hindi Summary: मैने 2019 में Lowendtalk पर Rsync के बारे में जाना था। Rsync की delta transfer तकनीक ने मुझे प्रभावित किया, और मैंने Debian पर इसके साथ प्रयोग करना शुरू कर दिया। यह टूल फाइलों को कुशलता से सिंक करने का एक शक्तिशाली तरीका साबित हुआ, खासकर बैकअप और मिररिंग के लिए।

Discovering Rsync: My First Encounter in 2019
In 2019, I discovered Rsync during a discussion on Lowendtalk, where users compared it to Rclone. The thread highlighted how Rsync efficiently syncs files between directories or remote servers, making it a game-changer for managing Debian Linux systems. Users shared their experiences using Rsync for automating backups, mirroring directories, and deploying websites with minimal overhead. It quickly became clear that Rsync was a reliable, high-performance tool for limited-resource environments like VPS.
Fun Fact :
rsync is the same tool that is used by Internet Archive, CERN, and Backblaze use to shuffle millions of gigabytes of data across continents every day.
rsync over SSH is basically the “universal conveyor belt” of the internet. So next time you run rsync -avz ~/Pictures/ backup-drive/, you’re literally using the same battle-tested engine that keeps the world’s biggest digital libraries in sync.
Why Rsync Stood Out for Me
Rsync’s delta-transfer algorithm stood out to me because it only sends changed portions of files, saving bandwidth and time. This was a game-changer for someone managing bandwidth constraints on a Debian VPS. Setting it up was effortless—Rsync is included in Debian’s default repositories, so a simple apt install rsync was all it took. I started with basic commands like rsync -avz /source/ /destination/ to sync directories locally, and its speed and simplicity were immediately impressive.
 Rsync’s delta-transfer algorithm in action, syncing large datasets efficiently.
I began experimenting with basic commands like rsync -avz /source/ /destination/ to sync directories locally, and the speed and simplicity of the process were impressive. It didn’t take long for me to realize that Rsync could be the solution to many of the backup challenges I had been facing, especially when paired with cron jobs for automation.
Connectivity loss and restoration
rsync over ssh breaks the job into tiny pieces, checks each piece for errors, and only resends the bits that changed. In case of connetivity loss, rsync just pauses, waits for the connection to come back, and picks up exactly where it left off. No special “error-check” flag is required. Rsync’s default block-level checksumming + --partial (-P) gives you automatic, cryptographically verified resume for free. Just re-run the same command.
$ rsync -avzP --info=progress2 -e ssh src/ user@host:/dst/My Early Experiments with Rsync on Debian
My first real-world test involved syncing my web server’s files to a backup directory. Using the -a flag for archive mode preserved permissions and timestamps, ensuring an exact replica. The --delete flag was initially intimidating—it mirrors deletions from the source to the destination—but it’s essential for maintaining true directory mirrors. I also learned the importance of --dry-run, which simulates the sync process to prevent accidental data loss. These experiments taught me that Rsync is not just about moving files but doing so intelligently.
I also learned early on about the importance of the --dry-run flag, which allowed me to simulate the sync process before actually executing it, saving me from a few potential disasters. These initial experiments taught me that Rsync wasn’t just about moving files; it was about doing so intelligently and efficiently, which was exactly what I needed for my Debian-based projects. Another key feature is its ability to resume interrupted transfers using the --partial flag. This is particularly useful for unstable connections or large files. Since Rsync is open-source and widely adopted, troubleshooting or optimizing its use is straightforward, thanks to extensive documentation and community support.
Rsync vs. Other Tools: Pros and Cons
When comparing Rsync to other tools like Rclone, tar, or scp, it’s important to understand their strengths and weaknesses. Rsync excels in local and server-to-server synchronization, especially over SSH, but it lacks native support for cloud storage providers like AWS S3 or Google Drive, where Rclone shines. Rclone, on the other hand, is designed for cloud storage integration and supports encryption, but it can be slower for local transfers compared to Rsync.
For simple file transfers, scp (Secure Copy Protocol) is a straightforward option, but it doesn’t have the efficiency of Rsync’s delta-transfer algorithm. Meanwhile, tar is great for creating compressed archives, but it doesn’t handle incremental backups or synchronization like Rsync does. Each tool has its place, and often, the best approach is to combine them—for example, using Rsync for local syncs and Rclone for cloud backups.
Sync vs. Backup: Understanding the Difference
Syncing and backing up are not the same. Syncing ensures two or more locations mirror each other in real time, including deletions, while backups create point-in-time copies for recovery. Rsync can do both, but caution is needed: the --delete flag mirrors deletions, which is risky for backups. For versioned backups, tools like timeshift or borg are better, as they allow restoring files from specific points in time.
 Timeshift creating snapshots for versioned backups, unlike Rsync’s real-time sync.
For example, using Rsync with the --delete flag is great for mirroring directories but could be disastrous if used for backups, as it would propagate deletions. For true backups, tools like timeshift or borg might be more appropriate, as they support versioning and snapshots, allowing you to restore files from a specific point in time. Here are the next three sections, continuing the conversational and factual style while focusing on practical insights, comparisons, and real-world applications:
Alternative Methods for Syncing and Backing Up
While Rsync is a powerful tool, it’s not the only way to sync or back up data on Debian. For cloud-based backups, tools like Duplicati or BorgBackup offer encryption, deduplication, and versioning, which are features Rsync lacks natively. Duplicati, for example, provides a user-friendly GUI and supports a wide range of cloud storage providers, making it a great choice for offsite backups. BorgBackup, on the other hand, is a command-line tool that excels in creating encrypted, compressed, and deduplicated archives, ideal for long-term storage.
 using ionice command to limit resource usage while using rsync
For those who prefer a more traditional approach, tar combined with gzip or bzip2 can create compressed archives that are easy to store and restore. However, unlike Rsync, these tools don’t support incremental backups, meaning each backup is a full copy of the data. Another option is unison, a file-synchronization tool that works across multiple platforms and supports bidirectional sync, which can be useful for keeping two directories in sync without overwriting changes.
When to Use Rsync Over Other Tools
Rsync is my go-to for syncing large directories between local drives or remote servers, especially when bandwidth efficiency is critical. Its delta-transfer algorithm makes it ideal for datasets with minor changes, such as logs or databases. However, for cloud storage or versioned backups, tools like Rclone, BorgBackup, or Duplicati are better suited due to their native support for cloud providers and versioning.
 Rsync’s efficiency in transferring only changed data, reducing bandwidth usage.
However, Rsync isn’t always the best choice for cloud storage or versioned backups. If I’m backing up to a cloud provider like AWS S3 or Google Drive, I’ll often use Rclone instead, as it natively supports these services and includes built-in encryption. Similarly, if I need versioned backups with the ability to restore from multiple points in time, tools like BorgBackup or restic are better suited due to their support for snapshots and deduplication.

Practical Tips for Using Rsync Effectively
Here are some tips I’ve learned for getting the most out of Rsync:
- Always use
--dry-runbefore executing a sync to preview changes and avoid accidental deletions. - Use
ioniceto limit I/O priority during large transfers, ensuring system responsiveness. - Automate backups with
cronorsystemdtimers for consistency. For example:0 2 * * * rsync -avz /source/ /backup/
 Using rsync for transfrring files on a nvme drive
Finally, automate your backups with cron or systemd timers to ensure they run consistently. For example, a simple cron job like 0 2 * * * rsync -avz /source/ /backup/ will run a daily sync at 2 AM, keeping your backup up to date without manual intervention. And if you’re syncing sensitive data, pair Rsync with SSH for secure transfers or use gpg to encrypt the files before syncing.
Conclusion: Why Rsync Remains a Staple in My Toolkit
Looking back on my journey since 2019, Rsync has proven to be one of the most reliable and efficient tools in my arsenal for managing data on Debian Linux. Its ability to perform delta transfers, preserve file attributes, and resume interrupted transfers makes it indispensable for local and server-to-server synchronization. While it may not be the best tool for cloud storage or versioned backups, its simplicity, speed, and flexibility have made it a cornerstone of my backup and sync strategies.

What I’ve come to appreciate most about Rsync is its adaptability. Whether I’m mirroring directories, deploying websites, or automating backups, Rsync’s robustness and efficiency have consistently met my needs. And while I’ve explored other tools like Rclone, Duplicati, and BorgBackup for specific use cases, Rsync remains my first choice for most synchronization tasks.
Key Takeaways
- Rsync’s delta-transfer algorithm makes it incredibly efficient for syncing large or frequently updated datasets, saving both time and bandwidth.
- While Rsync excels at local and server-to-server synchronization, tools like Rclone are better suited for cloud storage integration.
- Always use
--dry-runbefore executing a sync to avoid accidental data loss, especially when using the--deleteflag. - For versioned backups or cloud storage, consider complementing Rsync with tools like BorgBackup, Duplicati, or Rclone.
- Automate your backups with
cronorsystemdtimers to ensure consistency and reliability. - Use
ioniceto manage I/O priority during large transfers, ensuring your system remains responsive
 using rsync for creating snapshot with linux mint
Rsync Commands Cheatsheet
| Command | Explanation |
|---|---|
rsync -av /source/ /destination/ |
Archive mode with verbose output; copies all files from source to destination, preserving permissions and timestamps |
rsync -av --dry-run /source/ /destination/ |
Preview what would be transferred without making any changes; always test before running destructive operations |
rsync -av /remote:/path/ /local/path/ |
Pull files from a remote host over SSH to a local directory; replaces remote contents with local backup |
rsync -av --delete /source/ /destination/ |
Sync and remove files in destination that no longer exist in source; default deletes before transfer |
rsync -av --delete-after /source/ /destination/ |
Delete extraneous files from destination after the transfer completes instead of before |
rsync -av --delete-before /source/ /destination/ |
Explicitly delete files in destination before starting transfer; fastest when many deletions expected |
rsync -av --delete-excluded /source/ /destination/ |
Also remove files matching exclude patterns from the destination directory |
rsync -av --backup --backup-dir=/old/ /source/ /destination/ |
Create backups of overwritten or deleted files in specified directory instead of removing them |
rsync -av --link-dest=/previous/ /source/ /destination/ |
Incremental backup; unchanged files hard-linked to previous snapshot to save disk space |
rsync -av --exclude='*.tmp' --exclude='cache/' /source/ /destination/ |
Skip files matching specified patterns during synchronization |
rsync -avc /source/ /destination/ |
Force checksum-based comparison instead of size/modtime; verifies incremental integrity |
rsync -av --max-age=1w /source/ /destination/ |
Note: rsync has no native time filter; combine with find command to backup only files modified in past week |
find /source/ -mtime -7 -exec rsync -av {} /destination/ \; |
Backup only files modified in the last 7 days using find to filter before rsync |
rsync -av --delete --backup --backup-dir=/archive/ /source/ /destination/ |
Combined approach: sync changes, delete extras from destination, archive removed files separately |
rsync -av --partial --progress /source/ /destination/ |
Resume interrupted transfers and show live progress; useful for large files over slow connections |
rsync -av --stats /source/ /destination/ |
Show detailed transfer statistics including bytes sent, received, and list of transferred files |
rsync -azh /source/ /destination/ |
Use human-readable sizes in output; compress during transfer over network connections |
rsync -av --min-size=1M /source/ /destination/ |
Skip files smaller than specified size; filters very small files from backup |
rsync -av --remove-source-files /source/ /destination/ |
Remove files from source after successful transfer; useful for migration instead of backup |
rsync -av --update /source/ /destination/ |
Skip files that exist on destination with newer timestamp; protects newer versions from being overwritten |
rsync -av --existing /source/ /destination/ |
Update only files that already exist in destination; do not create new files or directories |
Note: Use
ioniceto limit the I/O priority of Rsync processes, ensuring system responsiveness during large transfers.
Rsync Flags Reference
| Flag | Explanation |
|---|---|
-a |
Archive mode; preserves recursive copy, symlinks, permissions, timestamps, group, owner, and device files |
-v |
Verbose; increases output detail showing which files are being processed during transfer |
-h |
Human-readable; displays file sizes in KB, MB, GB format instead of raw byte counts |
-z |
Compress; reduces data transferred over network connections by compressing file contents during transmission |
-r |
Recursive; traverses subdirectories when copying directories (included in -a) |
-l |
Preserve symbolic links as links rather than copying the linked file contents |
-p |
Preserve file permissions; maintains read/write/execute permissions on destination files |
-t |
Preserve modification times; keeps source file timestamps on copied files |
-g |
Preserve group ownership; maintains file group assignments on destination |
-o |
Preserve owner; maintains user ownership of files (requires root privileges) |
--dry-run |
Perform a trial run without making any changes; shows what would be transferred |
--delete |
Remove files from destination that no longer exist in source; defaults to --delete-before |
--delete-before |
Delete extraneous destination files before starting the transfer operation |
--delete-after |
Delete extraneous destination files after the transfer completes |
--delete-during |
Delete files during the transfer; same as --del alias |
--delete-excluded |
Also remove files matching exclude patterns from the destination directory |
--backup |
Create backups of files that would be overwritten or deleted during sync |
--backup-dir=DIRECTORY |
Specify directory where backed-up files should be stored with --backup flag |
--suffix=SUFFIX |
Set backup file extension; defaults to ~ when using --backup flag |
--link-dest=DIRECTORY |
Create incremental backups by hard-linking unchanged files to a previous snapshot directory |
--exclude=PATTERN |
Skip files matching specified glob patterns like '*.tmp' or 'cache/' |
--include=PATTERN |
Include files matching pattern even if an earlier exclude rule matched them |
--max-size=SIZE |
Skip files larger than specified size during transfer |
--min-size=SIZE |
Skip files smaller than specified size during transfer |
--partial |
Keep partially transferred files; enables resume capability for interrupted transfers |
--progress |
Display live transfer progress percentage and speed during operation |
--stats |
Print detailed statistics at end including bytes sent/received and transfer list |
--update |
Skip files that exist on destination with newer modification time than source |
--existing |
Only update files already present on destination; do not create new ones |
--ignore-times |
Transfer all files regardless of size or timestamp matching |
--checksum |
Force checksum comparison instead of size/time; verifies file content integrity |
--remove-source-files |
Delete source files after successful transfer; useful for moves not copies |
--timeout=SECONDS |
Set I/O timeout in seconds for network operations before aborting |
--bwlimit=LIMIT |
Throttle transfer bandwidth to specified KB/s to prevent network saturation |
--info=progress2 |
Show overall transfer progress instead of per-file progress (rsync 3.1+) |
Fun Fact: the -rlptgoD command
In rsync, -rlptgoD is the expanded form of the -a (archive) flag. Each letter represents a specific preservation option:
| Letter | Flag | What It Does |
|---|---|---|
-r |
--recursive |
Recursively copies directories and all their contents, including subdirectories |
-l |
--links |
Copies symbolic links as links themselves rather than following them to copy the target files |
-p |
--perms |
Preserves file permissions; destination files get the same read/write/execute permissions as source |
-t |
--times |
Preserves modification timestamps; destination files have the same mtime as source |
-g |
--group |
Preserves group ownership; files retain their group assignment on destination |
-o |
--owner |
Preserves user ownership; requires root/sudo privileges to maintain the original owner |
-D |
--devices --specials |
Preserves device files and special files (character/block devices, FIFOs, sockets); also requires root privileges |
Together, these flags create what's called "archive mode" - essentially cloning a directory tree exactly as it exists, including all metadata. This is why -a is the most commonly used rsync flag for backups. Without -a, rsync would only copy file contents without preserving these attributes, which could break executables, scripts, or cause permission issues when restoring. Source: rsync man page explanation
 Monitoring an Rsync transfer to ensure data integrity and efficiency.