Introduction
There is no shortage of tutorials explaining how to install WordPress on Apache or Nginx. Both are excellent web servers and power millions of websites around the world. However, they are not the only choices.
For several years, I have been exploring lightweight alternatives that are simple to understand, easy to maintain and capable of running comfortably on inexpensive Virtual Private Servers (VPS). One web server that has consistently impressed me is Lighttpd (pronounced Lighty). Combined with Debian, PHP-FPM and MariaDB, it forms a lean yet capable publishing platform for personal websites, blogs and hobby projects. In this guide, we'll build that platform from scratch using Debian 13 (Trixie), Lighttpd, PHP 8.3 or newer and MariaDB 11. While WordPress is used as the reference Content Management System (CMS) because of its popularity and extensive documentation, the same server stack can host many other PHP-based applications with little or no modification.
Unlike one-click installers, this guide explains how each component fits together. By understanding the individual building blocks, you'll be better equipped to troubleshoot problems, optimise performance and adapt the server for other applications in the future. Whether you're learning Linux server administration, migrating from a traditional LAMP stack or simply curious about a lightweight alternative to Apache and Nginx, this guide will help you build a fast, efficient and maintainable web server from first principles.
Summary (English): This guide demonstrates how to build a lightweight web publishing platform using Debian 13, Lighttpd, PHP-FPM and MariaDB, with WordPress as the reference CMS. You'll learn how the stack works, how to install and secure it, optimise its performance, and adapt it for other PHP-based content management systems.
सारांश (हिन्दी): यह मार्गदर्शिका Debian 13, Lighttpd, PHP-FPM और MariaDB का उपयोग करके एक हल्का, तेज़ और विश्वसनीय वेब पब्लिशिंग प्लेटफ़ॉर्म बनाने की पूरी प्रक्रिया समझाती है। उदाहरण के लिए WordPress का उपयोग किया गया है, लेकिन यही सर्वर संरचना ClassicPress तथा अन्य PHP आधारित CMS के लिए भी उपयुक्त है। इस लेख का उद्देश्य केवल वेबसाइट स्थापित करना नहीं, बल्कि पूरे सर्वर स्टैक को समझना, उसे सुरक्षित और अनुकूलित करना तथा भविष्य में अन्य अनुप्रयोगों के लिए उसका उपयोग करना है।
What is Lighttpd?
Lighttpd (pronounced Lighty) is a free and open-source web server designed to be fast, lightweight and efficient. First released in 2003, it was built around an event-driven architecture that allows it to handle many simultaneous connections while consuming relatively little memory and CPU. Although Apache and Nginx receive most of the attention today, Lighttpd has quietly earned a reputation for stability and reliability. It is actively maintained and powers websites, embedded systems, appliances and applications where performance and low resource consumption are important.

For personal websites, blogs and hobby projects, Lighttpd offers an attractive alternative to heavier web server stacks. Combined with Debian, PHP-FPM and MariaDB, it provides a simple yet capable platform that is easy to understand, deploy and maintain. Unlike many modern web hosting solutions that rely on multiple layers of abstraction, this guide uses a traditional Linux server stack. Each component has a clearly defined role, making it easier to troubleshoot, optimise and customise as your requirements evolve.
Why Lighttpd?
There are several reasons why I chose Lighttpd for this guide.
- Lightweight and efficient, making it ideal for inexpensive VPS instances.
- Excellent integration with PHP-FPM.
- Mature, stable and actively maintained.
- Straightforward configuration files that are easy to understand.
- Lower memory footprint than many traditional web server configurations.
- Perfect for personal websites, blogs, documentation sites and home labs.
Perhaps most importantly, Lighttpd demonstrates that building a fast website does not necessarily require a large server or a complex software stack.
Advantages of this Stack
Throughout this guide we'll build a server using:
- Debian 13
- Lighttpd
- PHP-FPM
- MariaDB
- WordPress
Who Should Use This Stack?
One of the strengths of open-source software is that there is rarely a single "best" solution. Every web server has its strengths, and the right choice depends on your requirements, experience and deployment goals. This guide is aimed at users who enjoy understanding how their server works rather than relying entirely on one-click installers, managed hosting platforms or complex orchestration tools. If you appreciate a lean software stack with clearly defined components, you're likely to feel at home with Lighttpd.
Is This Stack Right for You?
The following table should help you decide whether this guide matches your requirements.
| This guide is for | This guide isn't for |
|---|---|
| Personal websites and blogs | Large-scale enterprise hosting |
| Learning Linux server administration | Kubernetes or container-first deployments |
| Experimental projects | High-traffic commercial websites |
| Self-hosted applications | Multi-server clustered environments |
| Niche deployments | Users dependent on cPanel or Plesk |
| ClassicPress and WordPress users | Users who prefer graphical administration over the command line |
| Developers who enjoy building lightweight systems | Turnkey managed hosting solutions |
If your goal is to understand how a modern Linux web server works, build a fast publishing platform and maintain complete control over your environment, this guide is an excellent starting point. On the other hand, if your priority is running dozens of websites, serving millions of page views or managing a large hosting infrastructure, you'll be better served by technologies and architectures designed specifically for those workloads.
What You Will Learn
By the end of this guide, you will know how to:
- Build a lightweight web server using Debian 13 and Lighttpd.
- Install and configure PHP-FPM and MariaDB.
- Deploy WordPress on a clean Linux server.
- Secure the installation with HTTPS using Let's Encrypt.
- Perform basic performance tuning and security hardening.
- Understand how the same stack can host other PHP-based Content Management Systems.
- Build a solid foundation for creating your own automated deployment scripts, including future projects such as LightyPress.
The emphasis throughout this guide is on understanding the underlying technologies rather than simply copying commands. Once you understand the fundamentals, adapting the stack for another CMS or automating the deployment becomes significantly easier.
Pre-flight Checklist
Before installing any software, take a few minutes to verify that your server and development environment are ready. A little preparation now can save significant troubleshooting later.
Minimum and Recommended VPS
One of the biggest advantages of this stack is its modest resource requirements. Unlike many modern web stacks, Lighttpd is designed to be lightweight and efficient, making it an excellent choice for inexpensive Virtual Private Servers.
The following recommendations are intended for personal publishing, self-hosted applications, experimental projects and niche deployments.
| Component | Minimum | Recommended |
|---|---|---|
| Operating System | Debian 13 (Trixie) | Debian 13 (Trixie) |
| CPU | 1 vCPU | 2 vCPU |
| Memory | 1 GB RAM | 2 GB RAM |
| Storage | 20 GB SSD | 30 GB SSD or larger |
| PHP | PHP 8.3 | PHP 8.4 or newer |
| Database | MariaDB 11.x | MariaDB 11.x |
| Web Server | Lighttpd | Lighttpd |
| Network | Public IPv4 | Public IPv4 |
| Access | SSH with sudo privileges | SSH with sudo privileges |
For a single WordPress or ClassicPress website with modest traffic, the minimum configuration is usually sufficient. Additional CPU, memory and storage simply provide room for future growth, additional plugins and increased traffic.
Before You Begin
Ensure that you have the following before proceeding:
- A fresh installation of Debian 13
- SSH access to the server
- A non-root user with
sudoprivileges - A registered domain name (recommended)
- Basic familiarity with the Linux command line
- Approximately 30 to 45 minutes to complete the installation
If you already have a Debian server in production, you can still follow this guide. However, some configuration files may differ depending on the software already installed.
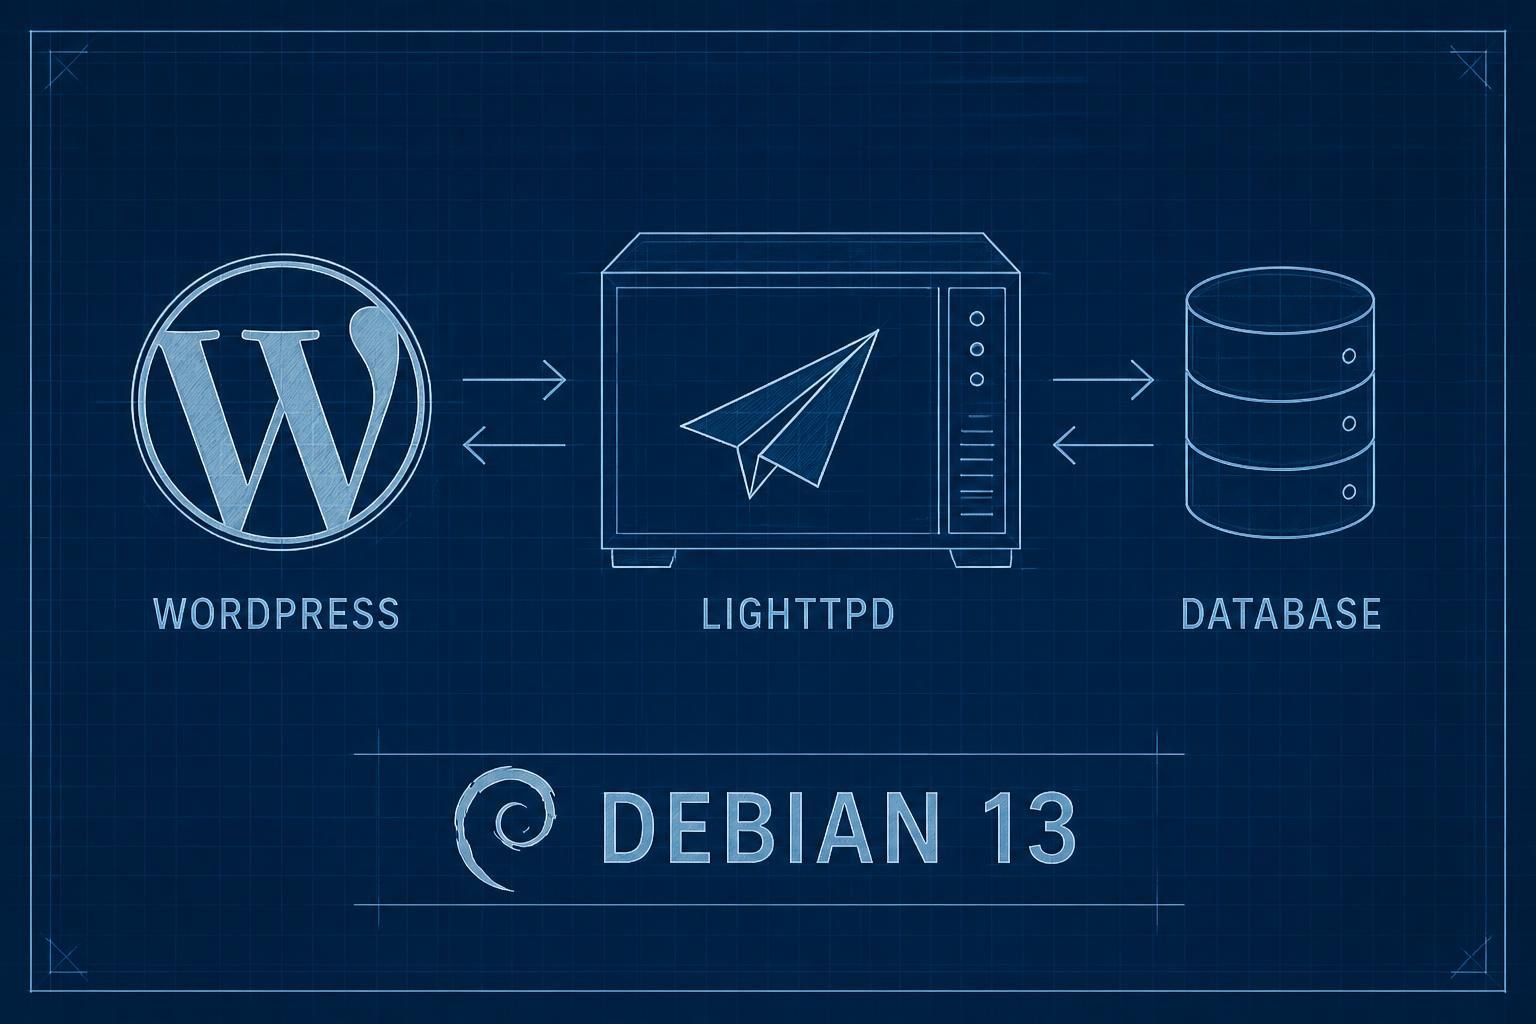
Architecture Overview
Before installing the software, it's useful to understand how the various components interact.
                    Internet
                        │
                  DNS / Domain
                        │
                   Lighttpd Server
                        │
                    PHP-FPM
                        │
                     MariaDB
                        │
        WordPress / ClassicPress
Each component performs a specific role:
- Lighttpd receives incoming HTTP and HTTPS requests.
- PHP-FPM executes PHP scripts.
- MariaDB stores your website's content and configuration.
- WordPress provides the Content Management System used to publish and manage your website.
Keeping these components separate results in a modular, maintainable and easy-to-understand server architecture.
Installation
With the planning complete, it's time to build the server. The installation is divided into a series of logical steps. Each step builds upon the previous one, making it easier to understand how the individual components work together.
Note: Below steps are details and may require a log of scrolling. To reduce scroll fatigue, I have collapsed the installation section for each step.
Step 1: Update Debian
Update the package index and install the latest security updates.
sudo apt update
sudo apt full-upgrade -y
If the kernel or other critical system packages are updated, reboot the server before continuing. Reconnect to the server using SSH after the reboot.
sudo rebootStep 2: Install Lighttpd
sudo apt install lighttpd -yEnable and start the service.
sudo systemctl enable lighttpd
sudo systemctl start lighttpd
Verify that the service is running.
sudo systemctl status lighttpdThe service should report active (running). You can also verify the installation by visiting your server's IP address in a web browser. If everything has been installed correctly, you'll see the default Lighttpd welcome page.
http://YOUR_SERVER_IPStep 3: Install PHP and Required Extensions
Install PHP-FPM together with the extensions commonly required by WordPress.
sudo apt install php-fpm php-cli php-common php-mysql php-curl php-gd php-xml php-mbstring php-zip php-intl php-imagick unzip curl wget -yVerify the installed PHP version. The output should display PHP 8.3 or later.
php -vStep 4: Install MariaDB
MariaDB is a community-developed fork of MySQL and serves as the database engine for WordPress. It stores your website's content, user accounts, configuration settings, comments and plugin data. Install MariaDB using the Debian package manager.
sudo apt install mariadb-server mariadb-client -yEnable the service so that it starts automatically whenever the server boots.
sudo systemctl enable mariadb
sudo systemctl start mariadb
Verify that the service is running.
sudo systemctl status mariadbYou should see the service reported as active (running). You can also confirm the installed version.
mariadb --versionStep 5: Secure MariaDB
Execute the following command:
sudo mariadb-secure-installationDuring the setup, you'll be prompted with several questions. The recommended responses are shown below.
| Prompt | Recommended Response |
|---|---|
| Enter current password for root | Press Enter |
| Switch to unix_socket authentication | Y |
| Change the root password | Y |
| Remove anonymous users | Y |
| Disallow remote root login | Y |
| Remove the test database | Y |
| Reload privilege tables | Y |
After completing the script, your MariaDB installation is considerably more secure and ready for production use.
Step 6: Configure PHP-FPM
PHP-FPM (FastCGI Process Manager) executes PHP scripts on behalf of the web server. Unlike Apache's traditional PHP module, PHP-FPM runs as a separate service, providing improved performance, better resource management and increased security. First, verify that PHP-FPM is installed.
php -vIdentify the installed PHP version.
php -r "echo PHP_MAJOR_VERSION.'.'.PHP_MINOR_VERSION;"The output will be similar to:
8.3Enable and start the PHP-FPM service (replace 8.3 with your installed PHP version if necessary).
sudo systemctl enable php8.3-fpm
sudo systemctl start php8.3-fpm
Verify that the service is running.
sudo systemctl status php8.3-fpmThe service should report active (running). At this stage, PHP-FPM is ready, but Lighttpd has not yet been configured to communicate with it. That configuration will be completed in the next step.
Step 7: Configure Lighttpd
With Lighttpd, PHP-FPM and MariaDB installed, the next step is to configure the web server to process PHP files correctly.
Begin by enabling the required Lighttpd modules.
sudo lighty-enable-mod fastcgi
sudo lighty-enable-mod fastcgi-php
Depending on your Debian and PHP version, you may also need to enable the FastCGI PHP-FPM configuration.
sudo lighty-enable-mod fastcgi-php-fpmNote: On some Debian releases,
fastcgi-phpautomatically configures PHP-FPM. Iffastcgi-php-fpmis unavailable, you can safely ignore this step.
Test the Lighttpd configuration.
sudo lighttpd -tt -f /etc/lighttpd/lighttpd.confIf no errors are reported, restart the web server.
sudo systemctl restart lighttpdVerify that the service is running.
sudo systemctl status lighttpdAt this point, Lighttpd is capable of serving both static HTML pages and dynamic PHP applications.
Step 8: Create the WordPress Database
Before installing WordPress, create a dedicated database and user account. Log in to the MariaDB console.
sudo mariadbCreate the database.
CREATE DATABASE wordpress CHARACTER SET utf8mb4 COLLATE utf8mb4_unicode_ci;Create a dedicated database user.
CREATE USER 'wordpressuser'@'localhost' IDENTIFIED BY 'StrongPasswordHere';Grant the necessary privileges.
GRANT ALL PRIVILEGES ON wordpress.* TO 'wordpressuser'@'localhost';
FLUSH PRIVILEGES;
Exit the MariaDB shell.
EXIT;Tip: Replace
StrongPasswordHerewith a unique, randomly generated password. Avoid using the MariaDB root account for WordPress.
Step 9: Download and Install WordPress
cd /var/www/htmlDownload the latest WordPress release.
sudo wget https://wordpress.org/latest.tar.gzExtract the archive.
sudo tar -xzf latest.tar.gzMove the extracted files into the document root.
sudo cp -r wordpress/* .Remove the downloaded archive and temporary directory.
sudo rm -rf wordpress latest.tar.gzAssign the correct ownership.
sudo chown -R www-data:www-data /var/www/htmlSet the recommended file permissions.
sudo find /var/www/html -type d -exec chmod 755 {} \;
sudo find /var/www/html -type f -exec chmod 644 {} \;
Create the WordPress configuration file.
cd /var/www/html
sudo cp wp-config-sample.php wp-config.php
Open the configuration file in your preferred editor.
sudo nano wp-config.phpUpdate the following values using the database name, username and password created earlier.
define( 'DB_NAME', 'wordpress' );
define( 'DB_USER', 'wordpressuser' );
define( 'DB_PASSWORD', 'StrongPasswordHere' );
define( 'DB_HOST', 'localhost' );
Save the file and exit the editor. WordPress is now installed and ready to complete the web-based installation in your browser.
sudo tar --strip-components=1 -xzf latest.tar.gz -C /var/www/htmlStep 10: Configure WordPress
With the files in place and the database ready, open your web browser and navigate to your server. If you are using a domain name:
https://yourdomain.comOr, if DNS has not yet been configured:
http://YOUR_SERVER_IPThe WordPress installation wizard will guide you through the remaining steps.You'll be asked to provide:
- Site Title
- Administrator Username
- Administrator Password
- Administrator Email Address
- Whether to discourage search engines from indexing the site (recommended only for development servers)
After submitting the form, WordPress creates the required database tables and completes the installation. Once finished, log in to the WordPress Administration Dashboard. Congratulations! Your WordPress website is now operational.
https://yourdomain.com/wp-adminStep 11: Secure Your Website with Let's Encrypt
sudo apt install certbot python3-certbot-nginxNote: At the time of writing, Certbot provides official plugins for Apache and Nginx. Since Lighttpd does not have an official Certbot plugin, certificates are obtained using the standalone or webroot method and then referenced in the Lighttpd configuration.
Stop Lighttpd temporarily.
sudo systemctl stop lighttpdObtain a certificate.
sudo certbot certonly --standalone -d yourdomain.com -d www.yourdomain.comOnce the certificate has been issued, restart Lighttpd.
sudo systemctl start lighttpdYour certificates will typically be stored in:
/etc/letsencrypt/live/yourdomain.com/Update the Lighttpd SSL configuration to reference the certificate and private key. Finally, verify automatic certificate renewal.
sudo certbot renew --dry-runNote: If your server is behind a firewall or reverse proxy, ensure that ports 80 and 443 are accessible before requesting certificates.
Step 12: Complete the Installation
Before declaring the installation complete, perform a few final checks.
Verify Services
Confirm that all required services are running.
sudo systemctl status lighttpd
sudo systemctl status php8.3-fpm
sudo systemctl status mariadb
All services should report active (running).
Verify HTTPS
Open your website in a browser.
https://yourdomain.comCheck that:
- The SSL certificate is valid.
- The browser reports a secure connection.
- There are no mixed-content warnings.
Verify WordPress
Log in to the WordPress dashboard and verify that:
- Pages load correctly.
- Permalinks can be updated.
- Plugins can be installed.
- Media uploads function correctly.
- Theme installation works as expected.
At this stage, you have successfully built a lightweight publishing platform using Debian, Lighttpd, PHP-FPM and MariaDB. The remaining sections focus on optimizing, securing and extending the installation for long-term use.

Post-installation Checklist
Before putting your website into regular use, spend a few minutes verifying that everything has been configured correctly.
Server
- [ ] Debian is fully updated.
- [ ] Lighttpd is running without errors.
- [ ] PHP-FPM is running correctly.
- [ ] MariaDB is active.
- [ ] Automatic security updates are enabled (optional but recommended).
Website
- [ ] WordPress installation completed successfully.
- [ ] Administrator account created.
- [ ] Site title and timezone configured.
- [ ] Permalinks updated.
- [ ] HTTPS is working correctly.
- [ ] Media uploads function normally.
- [ ] Plugins and themes install without errors.
Backups
- [ ] Database backup strategy defined.
- [ ] Website files backed up regularly.
- [ ] SSL certificates configured for automatic renewal.
Completing these checks now can save hours of troubleshooting later.
Performance Tuning
One of the advantages of this stack is that it performs well even on modest hardware. Nevertheless, a few simple optimizations can further improve performance.
Enable PHP OPcache and Caching Plugin
PHP OPcache stores precompiled PHP bytecode in memory, reducing script execution time and improving overall performance. If you're running WordPress, install a lightweight page caching plugin. Serving cached HTML pages dramatically reduces PHP execution and database queries.
Verify that OPcache is enabled.
php -i | grep opcache.enableEnable Compression
Enable Lighttpd's compression module to reduce bandwidth usage and improve page load times. Compression is particularly beneficial for HTML, CSS, JavaScript and JSON responses.
sudo lighty-enable-mod deflate
sudo systemctl restart lighttpd
Keep Debian Updated
Regularly install security patches and package updates.
sudo apt update
sudo apt upgrade
Enable Browser Caching
Configure appropriate cache headers for static assets such as images, stylesheets and JavaScript files.
$HTTP["url"] =~ "\.(css|js|jpg|jpeg|png|gif|svg|ico|woff2?)$" {
    setenv.add-response-header = (
        "Cache-Control" => "public, max-age=31536000"
    )
}
This allows browsers to cache static resources for up to one year, reducing repeat requests.
Optimize Images
Resize images before uploading them and use modern formats such as WebP or AVIF wherever possible. Smaller images reduce bandwidth consumption and improve page load times.
Consider a CDN
For websites with a global audience, consider using a Content Delivery Network (CDN) such as Cloudflare or Bunny CDN. A CDN reduces latency by serving static assets from edge locations closer to your visitors.
Use a Lightweight Theme
A lightweight web server cannot compensate for a slow theme. Choose a well-designed theme that minimizes JavaScript, CSS and unnecessary dependencies.
Monitor Resource Usage
Occasionally review CPU, memory and disk usage.
htopor
free -h
df -h
Performance tuning is an ongoing process. Start with a clean installation and optimize only where necessary.
Security Best Practices
Keep Software Updated
Regularly update Debian and installed packages.
sudo apt update
sudo apt upgrade
Use Strong Passwords
Use unique passwords for:
- Linux user accounts
- MariaDB
- WordPress administrator
- SSH keys (where applicable)
Disable Root SSH Login
Where possible, disable direct root login and use a regular user account with sudo.
Configure a Firewall
If your VPS provider does not already provide one, configure a firewall to allow only the required services.
Typical ports include:
- 22 (SSH)
- 80 (HTTP)
- 443 (HTTPS)
Enable Automatic SSL Renewal
Verify that Let's Encrypt certificates renew automatically.
sudo certbot renew --dry-runLimit Installed Plugins
Install only trusted plugins and remove those that are no longer required. Fewer plugins generally mean fewer security risks and lower maintenance.
Regular Backups
Backups are your last line of defense.
Maintain regular backups of:
- Website files
- Database
- SSL certificates
- Configuration files
Test your backups periodically to ensure they can actually be restored.
Troubleshooting
If something doesn't work as expected, don't panic. Most installation issues can be traced to a small number of common causes.
| Problem | Possible Cause | Suggested Solution |
|---|---|---|
| Lighttpd won't start | Configuration error | Run lighttpd -tt and review the configuration. |
| PHP files download instead of executing | PHP-FPM not configured | Verify the FastCGI modules and PHP-FPM service. |
| Database connection error | Incorrect database credentials | Review wp-config.php and confirm the database exists. |
| Permission denied | Incorrect ownership or permissions | Ensure files belong to www-data and verify directory permissions. |
| SSL certificate issues | DNS or firewall problems | Verify DNS records, ports 80/443 and rerun Certbot. |
| 404 errors after installation | Permalinks not refreshed | Save the permalink settings again from the WordPress dashboard. |
Useful diagnostic commands:
sudo systemctl status lighttpd
sudo systemctl status php8.3-fpm
sudo systemctl status mariadb

sudo journalctl -xe

sudo lighttpd -tt -f /etc/lighttpd/lighttpd.conf
Installing ClassicPress
If you prefer the traditional WordPress editing experience, ClassicPress is an excellent alternative. Forked from WordPress in 2018, ClassicPress retains the familiar TinyMCE editor and focuses on stability, long-term support and backward compatibility instead of introducing frequent feature changes.
Installing ClassicPress on Lighttpd is virtually identical to WordPress. The only significant difference is the download source. Instead of downloading WordPress from wordpress.org, obtain the latest ClassicPress release from the official website.
wget https://github.com/ClassicPress/ClassicPress-release/releases/latest/download/classicpress-nightly.zip
unzip classicpress-nightly.zip
sudo mv classicpress/* /var/www/html/
sudo chown -R www-data:www-data /var/www/html/
The remaining steps—including creating the MariaDB database, configuring PHP-FPM, setting file permissions and completing the web-based installer—are exactly the same as those described for WordPress.ClassicPress is particularly well suited for content-focused websites, business websites and long-lived projects where stability and familiarity take precedence over adopting the latest editor features.
Installing Other Content Management Systems
Although this guide uses WordPress as the reference implementation, there is nothing WordPress-specific about the underlying server stack. Once Lighttpd, PHP-FPM and MariaDB have been configured, the same environment can host a wide range of PHP-based Content Management Systems (CMS). WordPress was chosen because it is the world's most widely used CMS, has excellent documentation and provides a familiar starting point for most readers. Once you understand how WordPress is deployed, installing another CMS generally involves downloading the application, creating a database (where required) and following its installation wizard.
Database-backed vs Flat-file CMS
One advantage of PHP is the sheer number of applications available. Some require a database such as MariaDB or MySQL, while others store their content directly on the filesystem.
| Database-backed CMS | Flat-file CMS |
|---|---|
| WordPress | Grav |
| ClassicPress | Bludit |
| Drupal | Pico CMS |
| Joomla | WonderCMS |
| ProcessWire | Automad |
| Concrete CMS | |
| October CMS |
Regardless of the CMS you choose, the underlying server stack remains largely unchanged. In most cases, only the application files, database (if required) and a few configuration settings differ. As you become comfortable with this stack, you'll find it equally suitable for blogs, documentation sites, portfolio websites, intranets, knowledge bases and many other PHP-based web applications.
LightyPress
Throughout this guide, you've manually installed and configured every component of the server stack. While this approach provides the best learning experience, repeating the same steps for every new server quickly becomes tedious. That's the motivation behind LightyPress.
LightyPress is a personal project aimed at automating the deployment of a lightweight publishing platform built on Debian, Lighttpd, PHP-FPM and MariaDB. Rather than replacing the concepts explained in this guide, it builds upon them.
The long-term goal is to automate tasks such as:
- Installing and updating Debian packages
- Configuring Lighttpd and PHP-FPM
- Installing and securing MariaDB
- Creating WordPress or ClassicPress websites
- Configuring HTTPS using Let's Encrypt
- Applying sensible security defaults
- Performing basic performance optimizations
By understanding the manual installation first, you'll be able to appreciate what the automation is doing behind the scenes and troubleshoot issues should they arise. LightyPress is still under development, but this guide forms the foundation on which that project will be built.

Why Choose Lighttpd Today
Lighttpd has existed for over two decades, yet it continues to be actively maintained and remains an excellent choice for lightweight web servers. While much of today's attention is focused on containers, orchestration platforms and increasingly complex deployment pipelines, many personal websites and small deployments simply don't require that level of infrastructure. If your goal is to understand your server, minimise resource usage and maintain complete control over your environment, Lighttpd remains as relevant today as it was when it was first introduced.
Limitations and Challenges
No software is perfect, and Lighttpd is no exception. While it offers an efficient and lightweight alternative to Apache and Nginx, there are a few considerations worth keeping in mind.
Plugin Compatibility
Some WordPress plugins assume an Apache environment and automatically generate .htaccess rules. Since Lighttpd does not support .htaccess, equivalent rewrite rules must be configured directly in the Lighttpd configuration. Most popular plugins work without modification, but features related to URL rewriting, caching or access control may require additional configuration.
Smaller Community
Compared to Apache and Nginx, Lighttpd has a smaller user community. As a result, you may find fewer tutorials, blog posts and Stack Overflow discussions covering WordPress-specific configurations. Fortunately, the official Lighttpd documentation is comprehensive, and once the initial configuration is complete, day-to-day maintenance is minimal.
Learning Curve
If you're migrating from Apache, Lighttpd's configuration syntax may initially seem unfamiliar. URL rewriting, FastCGI configuration and virtual host management are handled differently, requiring a short learning period. However, many administrators find Lighttpd's configuration cleaner and easier to maintain once they become familiar with it.
Manual Configuration
Unlike many shared hosting environments, this guide intentionally avoids control panels and automated installers. That means you'll spend a little more time configuring services manually—but you'll also gain a much deeper understanding of how the server operates. For readers who enjoy learning Linux and self-hosting, this is an advantage rather than a drawback.
Frequently Asked Questions
Is Lighttpd suitable for WordPress?
Yes. WordPress runs well on Lighttpd when configured with PHP-FPM and MariaDB. Although Apache and Nginx are more commonly used, Lighttpd offers excellent performance, a smaller memory footprint and lower resource consumption, making it a good choice for personal websites, experimental projects and niche deployments.
What are the minimum VPS requirements?
A VPS with 1 vCPU, 1 GB RAM and 20 GB SSD storage is sufficient for a single WordPress or ClassicPress website with modest traffic. For additional headroom, a 2 vCPU and 2 GB RAM configuration is recommended.
Does Lighttpd support HTTPS?
Yes. Lighttpd fully supports HTTPS using TLS certificates from providers such as Let's Encrypt. This guide demonstrates how to secure your website using free SSL certificates.
Can I use ClassicPress instead of WordPress?
Absolutely. ClassicPress installs almost identically to WordPress. In most cases, only the download source changes, while the Lighttpd, PHP-FPM and MariaDB configuration remains exactly the same.
Can Lighttpd host other PHP applications?
Yes. Once configured, the same server can host many PHP applications including Drupal, Joomla, ProcessWire and several flat-file CMS platforms.
Is Lighttpd suitable for production?
Yes. Lighttpd has been used in production for more than two decades. While it has a smaller community than Apache or Nginx, it is stable, actively maintained and perfectly suitable for production deployments when configured correctly.
Conclusion
Building a modern web server doesn't have to involve dozens of services, complex orchestration platforms or expensive infrastructure. By combining Debian, Lighttpd, PHP-FPM and MariaDB, you've created a lightweight, modular and reliable publishing platform capable of hosting WordPress and many other PHP-based applications.
More importantly, you've learned how each component fits together. That understanding makes it easier to maintain your server, diagnose problems, experiment with other CMS platforms and automate future deployments. Whether you continue using this stack as-is or eventually migrate to Docker, Kubernetes or another platform, the knowledge gained from building it manually will remain valuable.
References and Further Reading
The following resources provide additional documentation and background information.
- https://www.classicpress.net/
- https://docs.classicpress.net/
- https://letsencrypt.org/
- https://certbot.eff.org/
- Official Lighttpd Website
- Lighttpd Documentation
- WordPress on Lighttpd – DigitalOcean Guide
- Lighttpd vs Nginx: Performance Comparison – TechRepublic
Final Thoughts
I hope this guide helped you build a fast, lightweight and reliable publishing platform.
If you discover a better approach, notice an error or have suggestions for improving this guide, I'd love to hear from you. Open source thrives on collaboration, and every piece of feedback helps make these guides better for everyone. You can also explore my other articles covering Linux, open source software, self-hosting, web hosting, cloud storage and server administration.
